

Motherboard Software
While there are many software that are available for the range of Gigabyte motherboard which can be consolidated via the APP Center software, we had a look at two main applications, which are the RGB Fusion and EasyTune software.
RGB Fusion
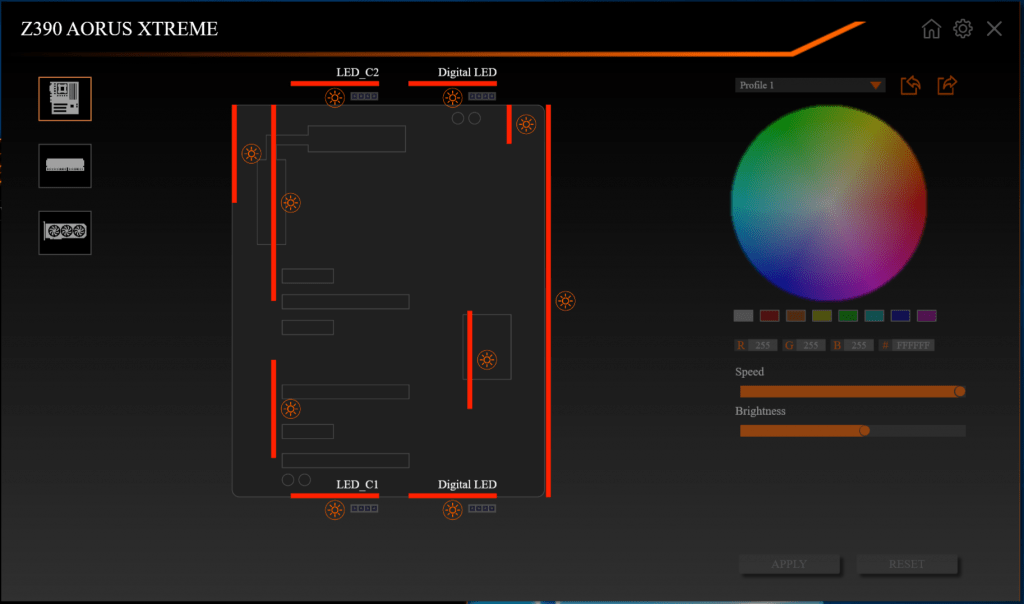
The RGB Fusion software can easily help users to identify which RGB LED to select for configuration. The software plots out all the areas where the LEDs are located and users can simply click on them to set the preferred RGB lighting colour and effect. The software even allows the customization of the brightness and the speed of the effects as well. Moreover, RGB Fusion will also work with all other RGB Fusion supported components. In our case, our RAM kit and Graphics Card can all be controlled via the same software as well.
EasyTune
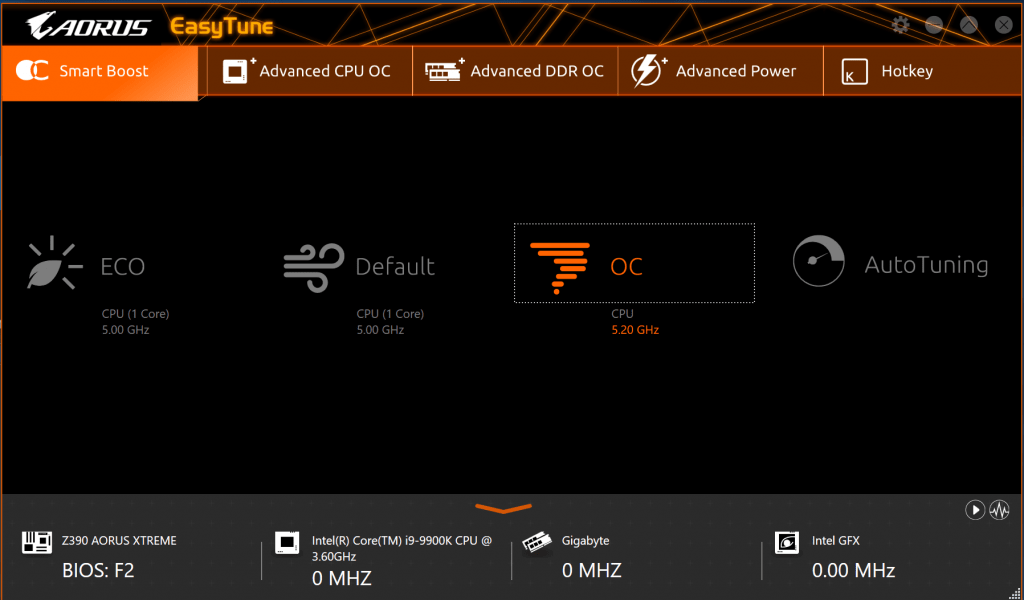
The EasyTune software makes it extremely easy to control CPU and motherboard settings via a friendly user interface. For a start, the first Smart Boost tab has got functions that are created for the less technical users. They can simply click on various CPU profiles to set the preset CPU settings. For example, if they want to set a known OC profile which overclocks the CPU to 5.2GHz, they can do so by simply clicking on the OC profile, instead of having to go into the BIOS and manually setting the CPU multiplier and voltages. This software overclocks your CPU in just 1 simple click!
Moreover, the software also has got a AutoTuning feature which tries to set the system with various CPU profiles and testing each profile for stability. The tuning will run through a few system restarts and help you to determine which OC profile fits best for your setup, which is likely constrained by the cooling solution on the CPU.
If you are more of an advanced user, both CPU and memory clock settings can be set with the EasyTune software as well. For CPU, the base clock and multipliers of the CPU settings can be manually configured. Once the “apply” button is hit, the settings will automatically apply. The voltages across the various component can also be set via the software.
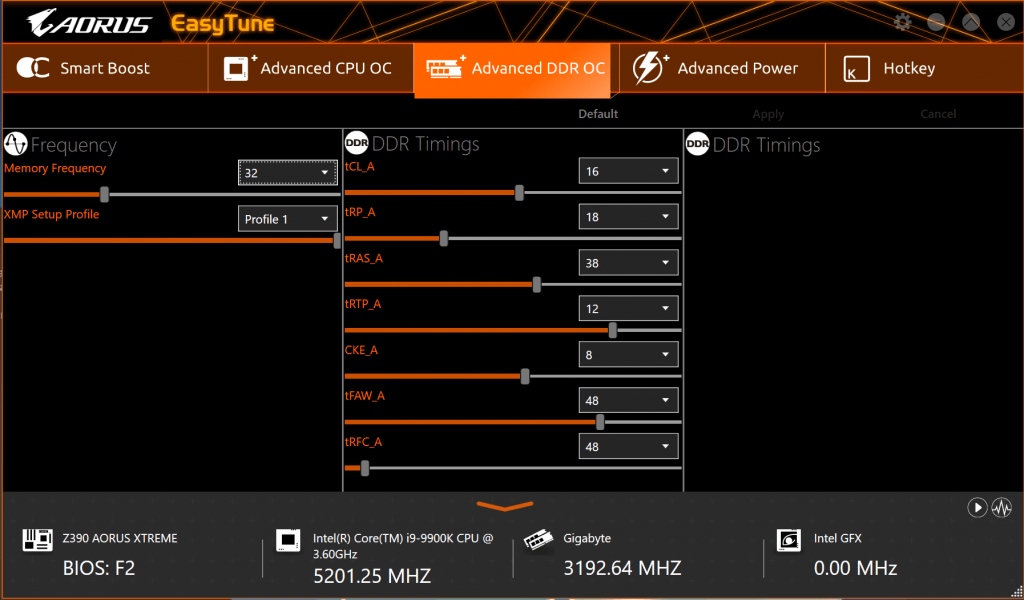
You can also manually adjust the memory via the software. Under the Advanced DDR OC tab, we can see that the software supports the applying of XMP profiles. Alternatively, it can also set the individual memory timings and memory frequency as well. However, do take note that a system restart is required to apply these settings.

The Advanced Power page allows the various power settings on the motherboard to be configured. This includes the Loadline Calibration and Switch rates and Current Protection settings.
It’s interesting to see how much Gigabyte has made system overclocking and configuration easier. In fact, with the software, there isn’t a need to go into the BIOS at all! All the main features that are needed for a system overclock can be accessed on the EasyTune software.
However, for more traditional users and overclockers who require even more advanced settings and special configuration options, the BIOS is still the default way to go.
BIOS
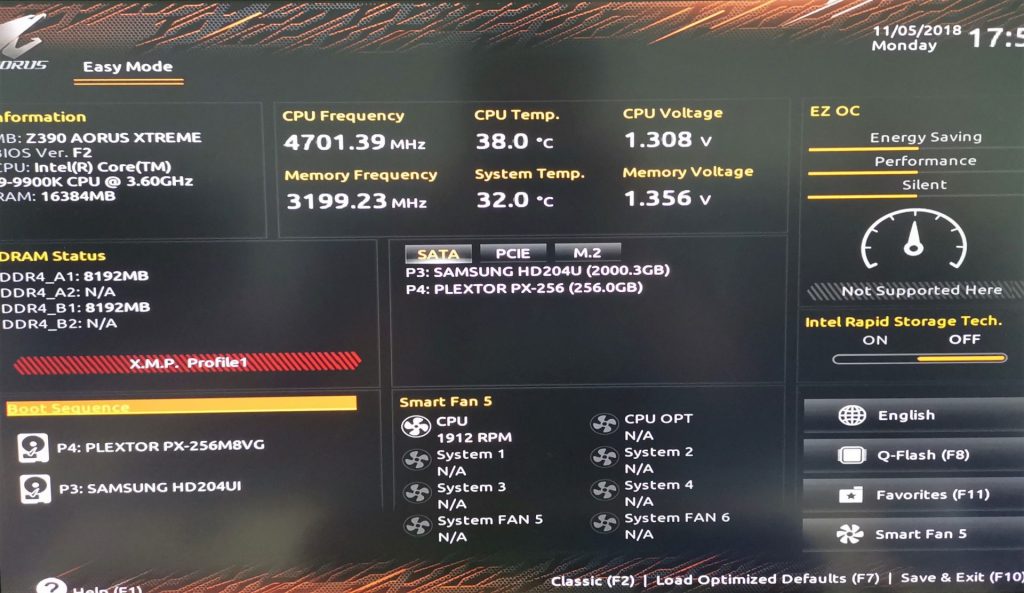
There aren’t much surprises or new features when it comes to the BIOS settings. Like many other manufacturers, Gigabyte has got two types of user interfaces, namely the Easy Mode and the Advanced Mode. If no overclocking of the system is required, the Easy Mode will suffice. It allows users to apply XMP profiles, change boot sequence orders, see the vital stats of the system, as well as apply simple CPU profiles.

For advanced users, the more traditional BIOS setting is still available. Similarly to older motherboard, the main menu options are still available at the top, and can be selected based on what the user is trying to achieve. Additionally, what I really liked about the BIOS is that there will always be description and hints available at the bottom right corner of the screen to tell you exactly what each option does. This is especially useful as different motherboard manufacturer uses different terms for the same thing, and it could be confusing for new adopters. The description can close up the gap between motherboard from different manufacturers.
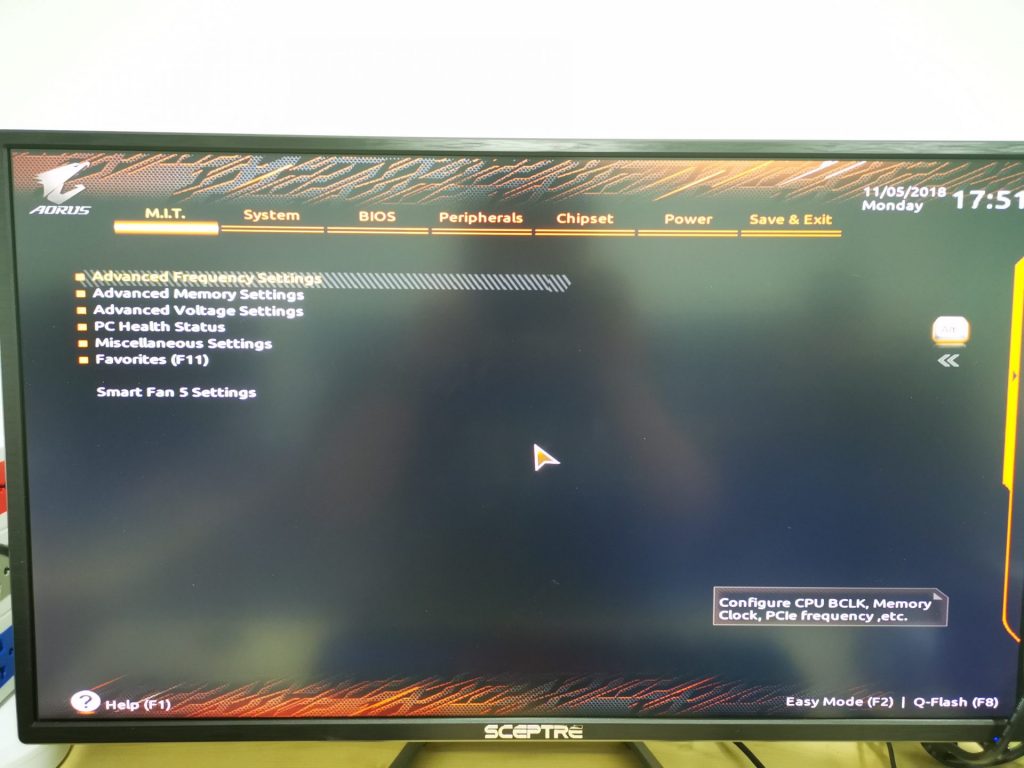
While the rest of the BIOS menu remains largely the same, I did not like the fact that Gigabyte has the Voltage Settings and respective frequency settings of the components separated. It is quite a hassle to toggle between the menu to simply overclock a specific component. For example, if I want to overclock the CPU, I will have to change between the Advanced Frequency Settings option and Advanced Voltage Settings just to achieve an overclock. It would make logical sense to place CPU related voltage settings together with the CPU overclocking settings.


Hello,
Is the Thunderbolt controller Titan Ridge or Alpine Ridge?
You can find out by opening Thunderbolt Software and posting screenshot of the “About” dialogue.
If you cannot post screenshot, please tell the NVM version and Thunderbolt controller – is it 1577, 15D2 or 15EB?
Thank you!