Are you still using emojis? You might be a little behind, boomer. Didn’t you know that stickers are the new emojis? People can have full-fledged conversations with just stickers and stickers alone. Compared to other social messaging platforms, Telegram stickers seem to exist in a whole universe on their own. That’s because the popular secure messaging app uniquely allows its users to make their very own stickers. (seriously, what can you not do on Telegram?)
Creating your very own stickers? Sounds like a childhood dream.
Read on to learn how you could make and share your very own stickers on Telegram so you could flex your creativity and style while chatting with your loved ones.
Step 1: Understanding the “design brief”
Before you begin designing your stickers, there are certain rules that you’ve got to understand and abide by:
- Telegram stickers must be PNG images, with a transparent background
- Your stickers cannot be larger than 512 x 512 pixels
- Each sticker should be a separate image file
- The designs should not contain copyrighted material
- Having an icon for your sticker pack is optional but if you’d like to have one, it should be a 100 x 100 PNG image with a transparent layer
Keep in mind that your stickers are public for everyone on Telegram. So, if there’s anything in your stickers that you’re not alright with strangers from across the globe seeing, it’s best to leave them out.
Step 2: Design your Telegram stickers
Now that we’ve got the nitty gritty out of the way, let’s move on to the fun part – designing! With image editing applications like Canva, GIMP, and Photoshop, you don’t have to be a designer to get started. Just be sure to follow the rules in step 1.
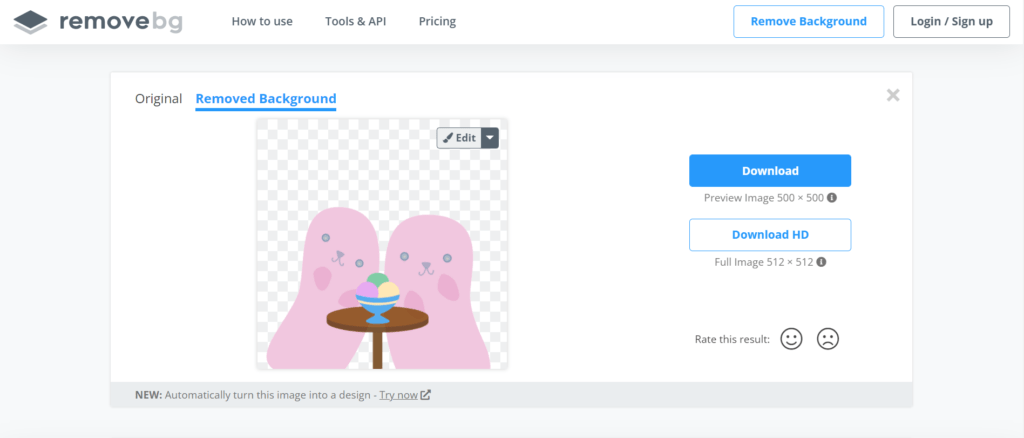
We used PowerPoint and Canva to create the designs before using remove.bg to remove the background of each design.
Step 3: Use the Telegram sticker bot
Once you’re satisfied with your designs, locate the sticker bot on Telegram. Simply use this link or type “stickers” into the search field on the messaging app.
You’ll then see a list of commands that you can use in the chat.
- /newpack to create a new Telegram sticker pack.
- /addsticker to add a sticker to an existing pack.
- /delsticker to remove a sticker from a pack.
- /ordersticker to reorder stickers in a pack.
- /stats to get usage stats for a specific sticker.
- /top to see the top stickers in your pack.
- /packstats to get usage stats for a sticker pack.
- /packtop to see your top sticker packs.
- /cancel to cancel whatever command you just used.
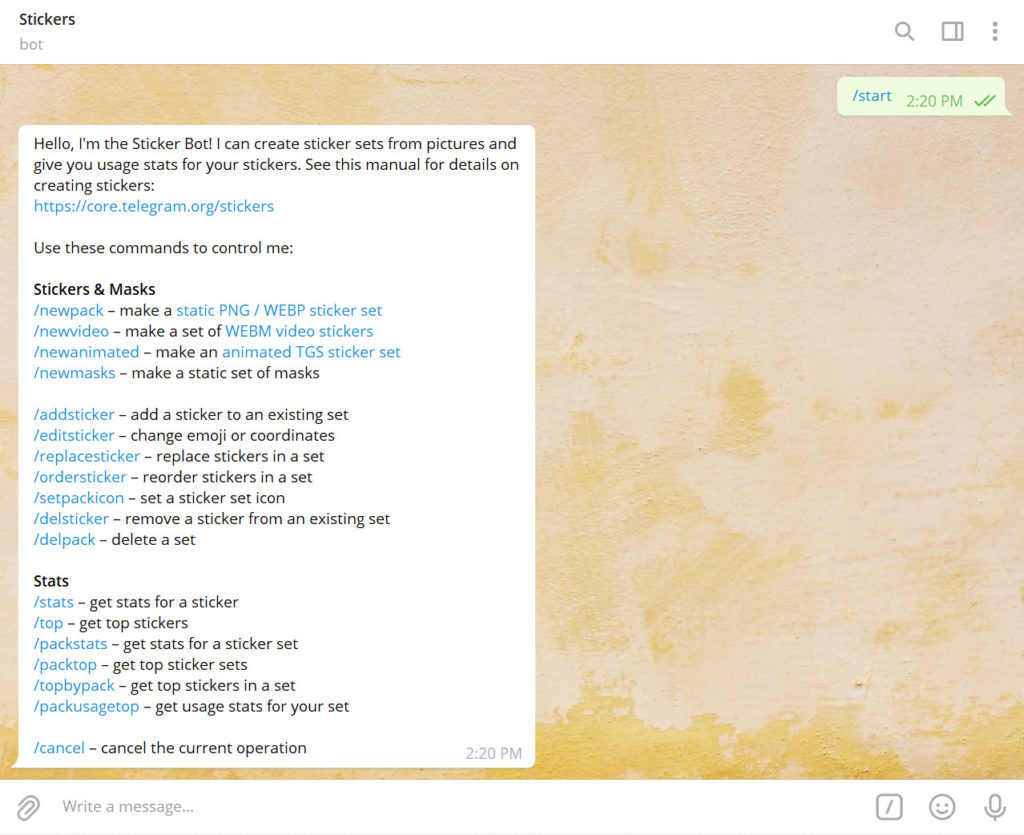
If this is your first time creating and setting up a sticker pack, click “Start” to start. If you’ve done this before, use the /newpack command.
Step 4: Upload your Telegram stickers
Uploading and publishing your sticker pack is easy with the sticker bot. Just follow these simple steps:
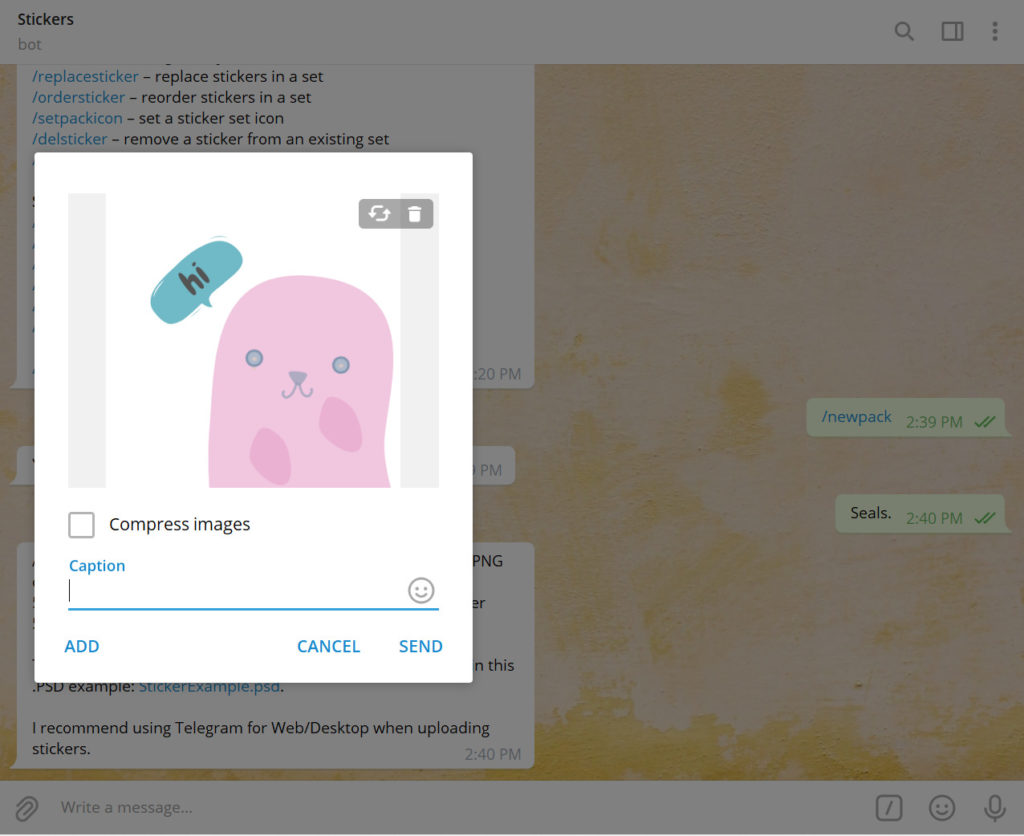
- Type in the /newpack command and hit enter on your keyboard
- Name your sticker pack and click the send arrow
- Now click on the “File” (the paper clip) icon to upload your first sticker [It’s essential that you upload it as a file, not as a photo. If you use the camera icon instead of the paper clip, the bot will reject the image]
- Uncheck “Compress”, then enter a caption and click “Add” to add more files, otherwise, click “Send“
- The bot will prompt you to assign an emoji to each new sticker. Choose an emoji that matches each sticker best and press “Enter” to confirm it
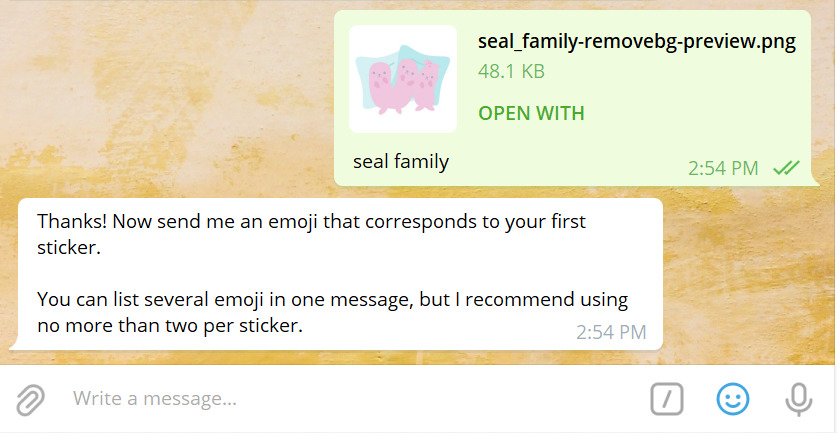
- Keep repeating steps 3 to 4 until you’ve added all the stickers into the pack
- Type in the /publish command when you’re done
- To add an icon for your sticker pack, upload it just like you uploaded the other images. Send the /skip command to skip this step.
- Finally, send the bot a name for your very own sticker pack!
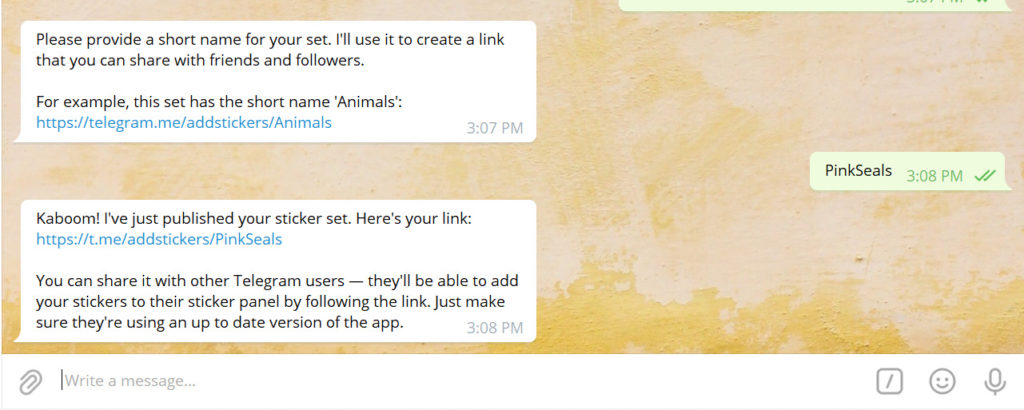
Step 5: Sharing is caring
After naming your sticker set, you’ll be sent a link to your Telegram sticker pack. When you click on the link, you can choose to do 2 things:
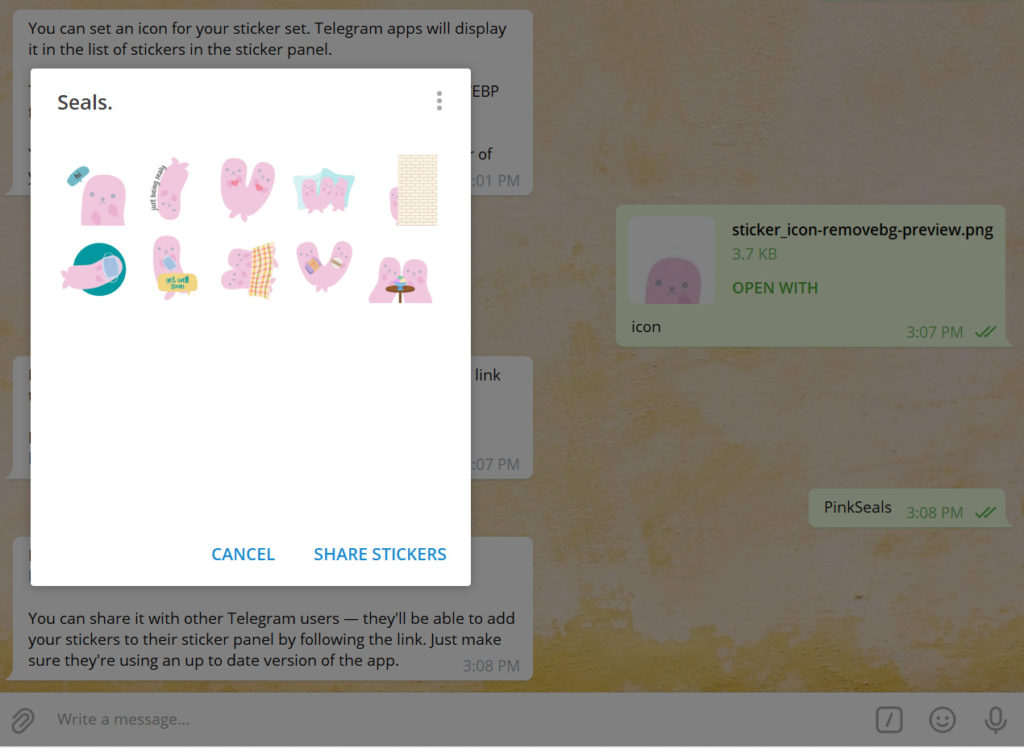
- To forward the link of your sticker pact to your friends, click “Share“
- To add the sticker pack to your sticker collection, click “Add Stickers“. This way, you could send individual stickers to your contacts who can then add them to their collection by tapping on the sticker you sent
Step 6: Repeat steps 2 to 5
Congratulations! You now have your very own set of stickers! After learning how easy it is to create your own sticker pack, we’re pretty sure you’re not gonna stop there. So, repeat steps 2 to 5 above to create more sticker packs to share with your friends and family!


